Electrumpet Sensors

It has always been the idea to create a real hybrid instrument and not an acoustic instrument with some extra sliders and buttons. In this sense existing hybrid trumpets did not always appeal to me and some of the others were to directly linked to the trumpet playing itself. I wanted the extra sensors to have the capability of expressive use. Most of the sensors can also be touched while I am playing. Whether I succeeded in accomplishing the expressive part is also very dependent on the sound design and mapping.

Sensors (in order of implementation on the instrument.

Original Electrumpet:

Recording buttons / mode buttons (right hand):

wpid-IMG_4036-2014-04-11-08-47.jpg wpid-DSC_0304-2014-04-11-08-47.jpg
Old (top) and new (bottom) recording / mode switch buttons. Top standard switches with knobs glued on top. Bottom self made pressure sensors in a copper housing with the same knobs on top.

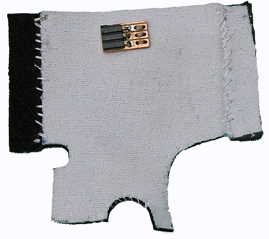
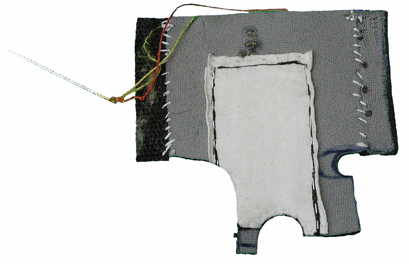
There are four buttons with which I can record channels. At first I used normal on/of switches for this but I changed this to pressure sensors used like a Schmitt trigger to have less ‚clicking noises’. The sensors are close to the normal valves of the trumpet. The pressure sensors are ‚home made’ from fabric with a little bit of felt added in the contraption for better haptic feedback. They can be used for both recording on/off as for mode switches per channel (four). For a future version I’d like to implement an extra button for „recording off” on the left thumb because it is hard to stop the recording while playing at the moment.

Electronic valves (sliders with a spring):

wpid-IMG_4033-2014-04-11-08-47.jpg
Two of the digital valves on the Electrumpet (old version)

In the beginning when I developed the electrumpet I thought that having extra valves would allow me transfer my playing dexterity on the normal valves to some kind of dexterity in an electronic sense. I still have not had the idea to accomplish though other then making just an electronic trumpet…. At the moment these valves (the same valves) are used to scroll through recorded sounds. These sounds can be played both chaotically and in a loop. With the valve I can determine beginning and end points of loops, chaotic buffer playback or stop playing (gesture). It is my intention to have other ‚selection methods’ on the valves in the future when I implement for example concatenate playing of recorded samples that are analyzed (audio descriptors and segregation through onset detection).

Thumb switches (right thumb):

wpid-DSC_0293-2014-04-11-08-47.jpg
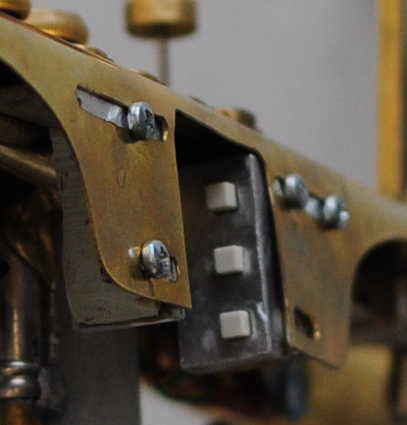
three of the thumb switches. The other three are on the aluminium holder that we see from the back.

These are six switches operating in pairs. three switches for louder / more tone shaping / speed up and three switches for softer / less tone shaping / speed down. These buttons were there from the start. In the second version of the trumpet they are mounted much more stable.

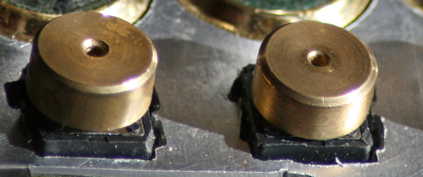
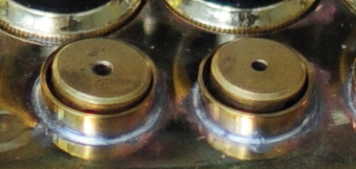
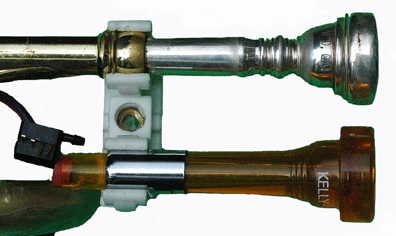
transposition pressure sensors (left hand pointing and middle finger):

wpid-trompet046-2014-04-11-08-47.jpgwpid-DSC_0041finalwhite-2014-04-11-08-47.jpgwpid-DSC_0043finalwhite-2014-04-11-08-47.jpg
Old pressure sensors (standard FSR’s) and new fabric pressure sensors (the bottom two pictures front and back).

These sensors are on the third valve and they are made from fabric. Originally I used ‚normal’ FSR’s but they were to vulnerable in a bending situation. The sensors change over time. In the next version of the electrumpet they should be fitted out with an opamp amplifying system to have better sensitivity.

Added during the years:

‚Electronic’ mouthpiece:

wpid-DSC_0034final-2014-04-11-08-47.jpg
Plastic mouthpiece with pressure sensor in the first version of the Electrumpet. In the second version the sensor is part of the PCB board.

The Electronic mouthpiece is actually a plastic marching band mouthpiece in combination with a pressure sensor and is used to make envelopes on recorded material. In a musical situation I mostly use it to play recorded bass note frequencies with good timing (the latency is mostly better compared to live transposition and another advantage is that the original note can not be heard). Transposition value and average envelope value can be frozen by using the electronic valves.

Ribbon controller:

wpid-DSC_0149-2014-04-11-08-47.jpg
wpid-DSC_0150-2014-04-11-08-47.jpg
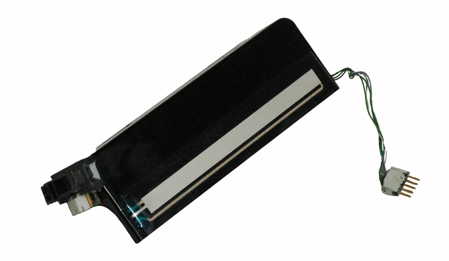
Back and frontside of the plastic holder carrying the infrared sensor and the ribbon controller.

The ribbon controller is used for discrete but varying selections during playing. In one of the modes the number of notes frozen in a spectral delay can be determined in another mode I switch between different harmonization sets (within a superset determined by number / arranging style).

Infrared sensor:
Adding this sensor was a big help in the clarity of the instrument to the public. The fact that people could clearly see me manipulate the sound at least with one sensor helped them understand / accept other electronic actions much better. This sensor is mainly used for filtering actions (which is similar to the way a plunger mute is used when playing acoustic). Current filtering actions are wahwah and formants. The filtering style changes dynamically based on the noisiness of the sound signal.

Microphone:
Of course the microphone was used already at the very beginning of the Electrumpet but it was not used as a sensor. I use a microphone (Shoeps CMC6 with a supercardioid capsule) on a stand. The stand enables me to play with the distance. At the moment the pitch, the volume and the noisiness as well as onset detection are used to control the sound processing. In order to have less latency some of these measurements should be done on the Electrumpet. See future additions.

Future additions / changes:

Replace the infrared sensor with the gestic:

wpid-DM160218_Hillstar_Dev_Kit-2014-04-11-08-47.jpg
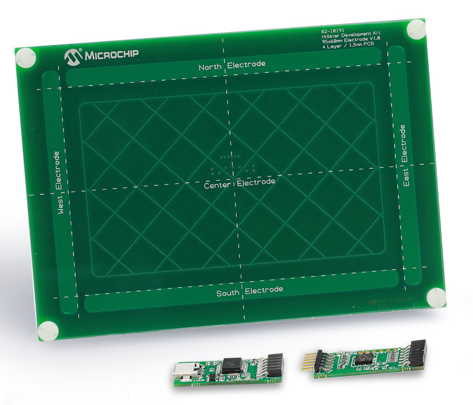
Gestic Hillstar development KIT that I am experimenting with.

the gestic is a sensor that works much like a theremin but it does so in three dimensions. It can measure the distance of objects to five electrodes and is thus able to give a 3D position of a hand relative to the sensor whereas the infrared sensor only measures distance. Other advantages above the infrared sensor: higher sample frequency (2 ms vs 30 ms) and not susceptible to disturbances from theater lights (which mostly emit a lot of infrared radiation). Research is needed to see if the gestic has other practical issues in a professional context. The gestic communicates through I2C.

Add an internal microphone:

I am still contemplating the best way to place this microphone and which microphone to use other then a simple electret microphone. Good suggestions are welcome.

The most important aspect of having a microphone on the instrument is to be able to gate the sound. Drum sounds especially are picked up by the microphone also when you don’t want them to be picked up. Apart from that a few other things can be improved by doing the sound processing on the trumpet (onset and preferably pitch detection for really fast reaction to new notes which is beneficial for less transposition latency).

Add a 9-axis position and acceleration sensor:

wpid-11486-01-2014-04-11-08-47.jpg
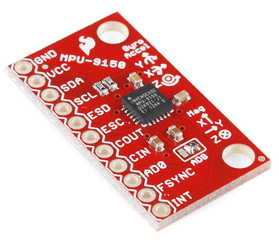
MPU-9150 breakout from Sparkfun (https://www.sparkfun.com/products/11486) which might be my 9-axis sensor.

Although I was not much in favor of implementing a sensor that could measure my movements in the beginning (I was afraid that it would restrict me to much), I now think it could be a nice addition in some cases. Such a sensor will most probable communicate through I2C or SPI.

Replace the ribbon controller with a capacitive sensor? and maybe add one to have two on top of each other?:

wpid-slider2-2014-04-11-08-47.jpg
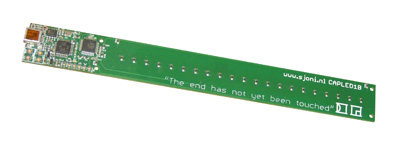
Brand new capacitive touch slider from Sjoni (www.sjoni.nl) which might be the next slider sensor.

This is a relatively new idea. With the capacitive sensor I can measure the position before I touch the sensor. This might be handy when you want to look for a certain (pre)set without already triggering it. It would be nice to have two of them as well above each other.

Wireless communication

When I started with the Electrumpet it was immediately clear that I wanted it to be wireless. I could not imagine myself playing an instrument and not feel free in my movements. (actually the first student project which was not really an Electrumpet yet had wires and I felt restricted). There are still ideas to be developed that require wireless communication (like spatialization based on trumpet position) but also the practical issue of not having your trumpet gripped from your hands or the stand because somebody (probably me) stumbles over the wires. Since the beginning I have used a few different options.

I have to warn you that this chapter can be quite technical.

Arduino Bluetooth (Electrumpet version 1.0)

Although it was kind of briljant to make a cast for vacuüm forming a plastic holder for the arduino that I could clip on the trumpet it also looked very proto typic and it was a little bit vulnerable for breaking. It never did luckily but I always had to be very careful.

wpid-IMG_4013-2014-04-11-00-541.jpg
The Arduino bluetooth attached to the trumpet with some vacuum formed plastic and wires connecting the sensors

The most important reason to step away from this platform was the latency. Although I never measured it exactly it was notable when playing and more important it was not stable (I figure that a stable latency that is less then 10 ms is kind of a must). Connecting blue giga the manufacturer of the bluetooth module on the Arduino learned me that bluetooth 2.1 has an inherent latency of at least 10 ms but probably more. Newer versions of bluetooth might work better but I decided to go for another platform that was promising. One of the issues with wireless technologies and separate modules to send the data is that the package of data needs time to be formed (it needs a header, there is a checksum to be calculated etcetera). This task is mostly carried out by a separate controller that is part of the wireless module that also has to handle the serial communication with the microcontroller. I always found it hard to get the exact information on the latency involved in the transfer of a package. Roving technologies from which I was testing one of their WIFI modules admitted that while the throughput speed of data was quite high I would never be able to send packages with a rate higher then about 15 ms in between packages to keep my connection stable. Newer modules have faster processors as part of their architecture and the possibility to send data through SPI. I am researching new options for wireless connection.

XBEE direct:

Witnessing the presentation of a NIME article on wireless communication from IRCAM in Oslo 2011 (Flety 2011*) which was used in their MO handheld unit caused me to change to working with XBEE’s in API mode using the direct sensing possibility of the XBEE radio’s. Since I only used sensors with analogue outputs this was well feasible. With 3 XBEE pairs I had about 18 analogue sensor inputs that I could use. I used one of those to measure my digital switches (9 in total) by using them in a parallel series of switched resistors.

wpid-powerpackXBEEs-2014-04-11-00-541.jpg
Picture with two of the three XBEE’s that are on the Electrumpet

the other side of the XBEE pairs was connected directly to the computer.

It was now that I discovered that the serial communication in MAX/MSP (the program that I use for audio processing) is not very stable. MAX own serial object again gave me unstable results. Luckily I discovered alternatives and I have used the Comport object ported from Pd by Jasch which was very stable in its latency and throughput. The problem with all serial communication though that strange things could happen when MAX would crash. The serial port was often occupied which resulted in the fact that I could not use my mousepad and keyboard anymore nor could I use my XBEE sensors anymore so I had to restart the computer when a crash occurred. This was especially bad when I had to work on a patch that was not yet stable. It was also very hard to trouble shoot.

I have worked with this setup for about two years though until I found the courage to change the setup again. One of the culprits in Serial communication is the FTDI chip that is needed on the hardware side (in my case the XBEE explorer board) for the serial communication. A driver in the computer manages the process of handeling the communication. Normally this driver will have a buffer that is flushed once in 16 ms. With the help of FTDIchip.com I managed to get this down to 2 ms but I knew I wanted to get rid of the serial communication.

Teensy 3.1:
I was already familiar with the teensy family through my contacts with UC Berkeley. They had good experiences with the teensy connected to their multitouch and multi pressure finger pads (eg David Wessels instrument) (Roh 2011**). The teensy does not use the FTDI chip for serial communication but sends the data directly through USB which can handle 12 Mbps and is also much better in handling the connection (it does not hold the ports when the program that uses the connection crashes). When the teensy 3.0 and 3.1 came out they came with three UART ports. On the computer side I decided to connect a teensy to the three XBEE receivers through those UARTs. I then used the direct USB speed.

Ethernet, OSC and UDP:
Encouraged by the stability improvement of using the teensy and USB speed I now contemplated the other improvement that was in the article of Roh which I also spoke about with Yotam Mann one of the co-authors of the Roh article. To send OSC messages over ethernet (UDP protocol) which he claimed was the fastest option. I added the Wiz820 ethernet module to my setup and used the Arduino OSC library to make OSC messages to MAX. This not only improved stability but it also reduced the processing power needed by the computer (MAX MSP) quite a bit.

Future:
Although I am happy with the current setup it cannot last. I would like to implement a few new sensors on the Electrumpet that communicate through I2C instead of a ‚normal’ analogue voltage that I can sample. In order to communicate these values I will need a microcontroller to gather the data and then sent it on through some form of wireless communication. At this moment I am still contemplating which platform to use. Any advises on the best option are welcome. More on my struggles with wireless communication in coming blog posts.

I will also add a schematic and some other pictures to this post.

*Fléty, Emmanuel, and Côme Maestracci. “Latency improvement in sensor wireless transmission using IEEE 802.15. 4.” Proceedings of the International Conference on New Interfaces for Musical Expression. 2011.

**Roh, J., et al. “Robust and reliable fabric, piezoresistive multitouch sensing surfaces for musical controllers.” New Interfaces for Musical Expression. 2011.

The Electrumpet state of things

The Electrumpet saw the light at the end of 2007. The idea was older though. Students of the TU Eindhoven were asked to design an augmented instrument. Some of their ideas were useful in the new design.

From the beginning of the project the work is roughly separated in the following fields:

  • Wireless communication with the computer
  • Which sensors can be used and placed where (ergonomics and naturalness)
  • (original) Sound Design that is connected to mapping
  • Optimal software solutions
  • Musical implication of the Sound Design
  • Real time playing vs composition and recording
  • Implementation in real playing situations
    • technically
    • artistically
    • practically
  • Building and aesthetics

I will make separate blogs on each of those topics state of the art.

Starting this blog

Today I decided to use a blog to keep track of my progression of my PhD research but also my other activities involving the PhD. I will have to track back a little because I do not suddenly start with my activities in electronic music but I will try to keep it focussed on the newest developments with maybe a little bit of history if needed. I started my PhD at Huddersfield on the first of april 2014. My supervisor is Pierre Alexandre Tremblay co supervisor is Elisabeth Dobson. Hopefully I will make a big step in developing my artistic insights through the Electrumpet, my overview of the field of electroacoustic music and research, its literature and in knowledge concerning the methodology of teaching live electronics and interaction.

wpid-DSC_0294_bijgesneden_verkleind-2014-04-3-21-05.jpg

The Electrumpet:
First of all I am the inventor of the Electrumpet. The instrument with which I won the Guthman competition 2013 in Atlanta Georgia. It is a hybrid or augmented instrument. Sensors on the trumpet can control the processing of the sound of the trumpet in the computer. The challenge is to make this control feel natural and thus support its musical use. Not hindered by technical restrains (latency, resolution of the measurements, unnatural handling of the instrument etcetera) it should feel like a new instrument where digital parameters are controlled with the same expression as the acoustic ones. More on my current work on the Electrumpet in other blog posts.

Education:
I am teaching at both the HKU (University of the Arts Utrecht, location Hilversum, school music technology) and at the TUe (Technical University Eindhoven, faculty Industrial Design, theme Playful Interactions). At both universities we teach the electroacoustic use of sound in designs for musical instruments and installations. The artistic methodology developed seems to be promising. We share it with the outside world (NIME for instance) but we miss a scientific / pedagogical / psychological groundwork. Much of our philosophies towards teaching are supported by studies on an ecological approach towards teaching music and improvisation and electroacoustic music. A well organized overview is missing. My own interest then lays within the field of digital and electroacoustic instruments that can be expressively played.